After generating an OFX file for import into NetSuite from Ledgible, follow these steps to bring it in to your NetSuite instance.
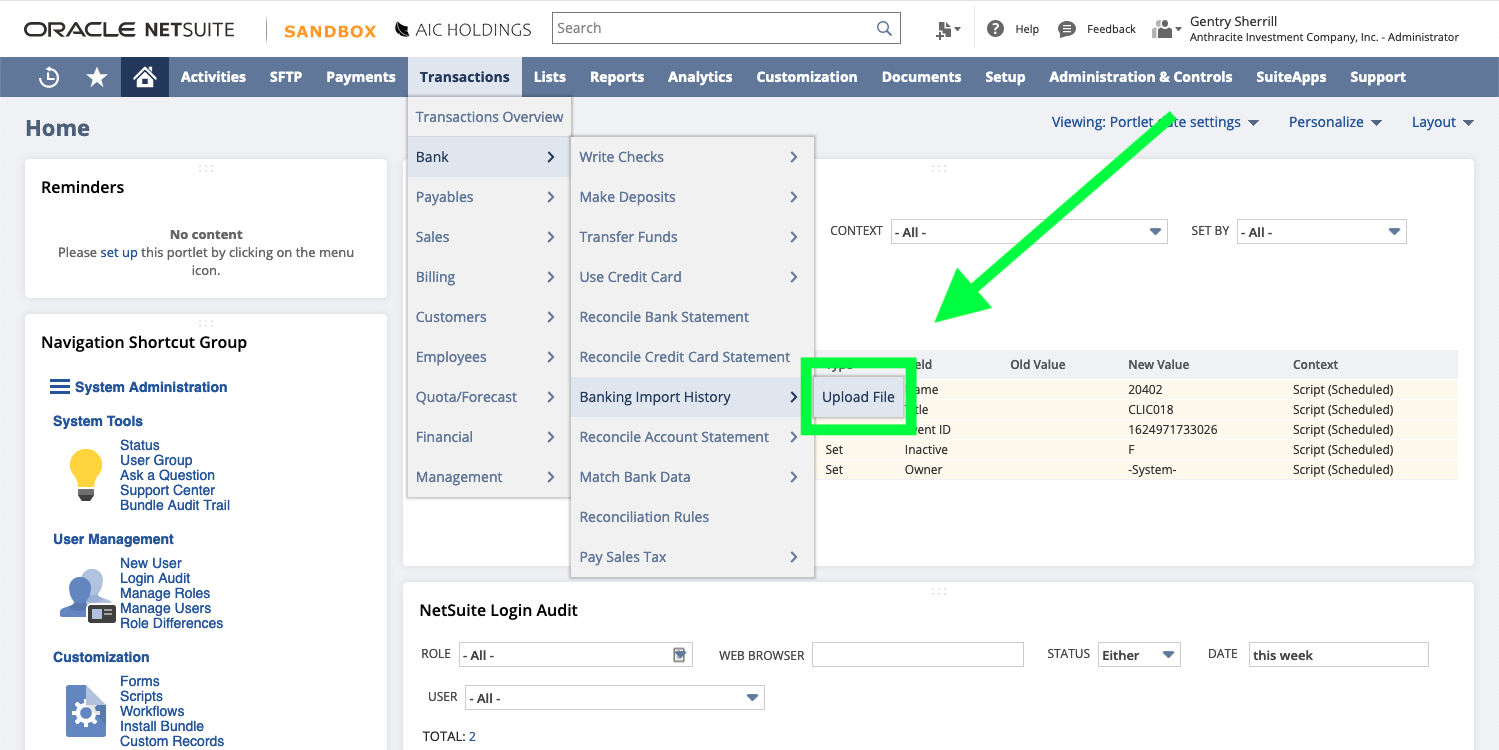
1. From your NetSuite dashboard, begin by clicking Transactions > Bank > Banking Import History > Upload File
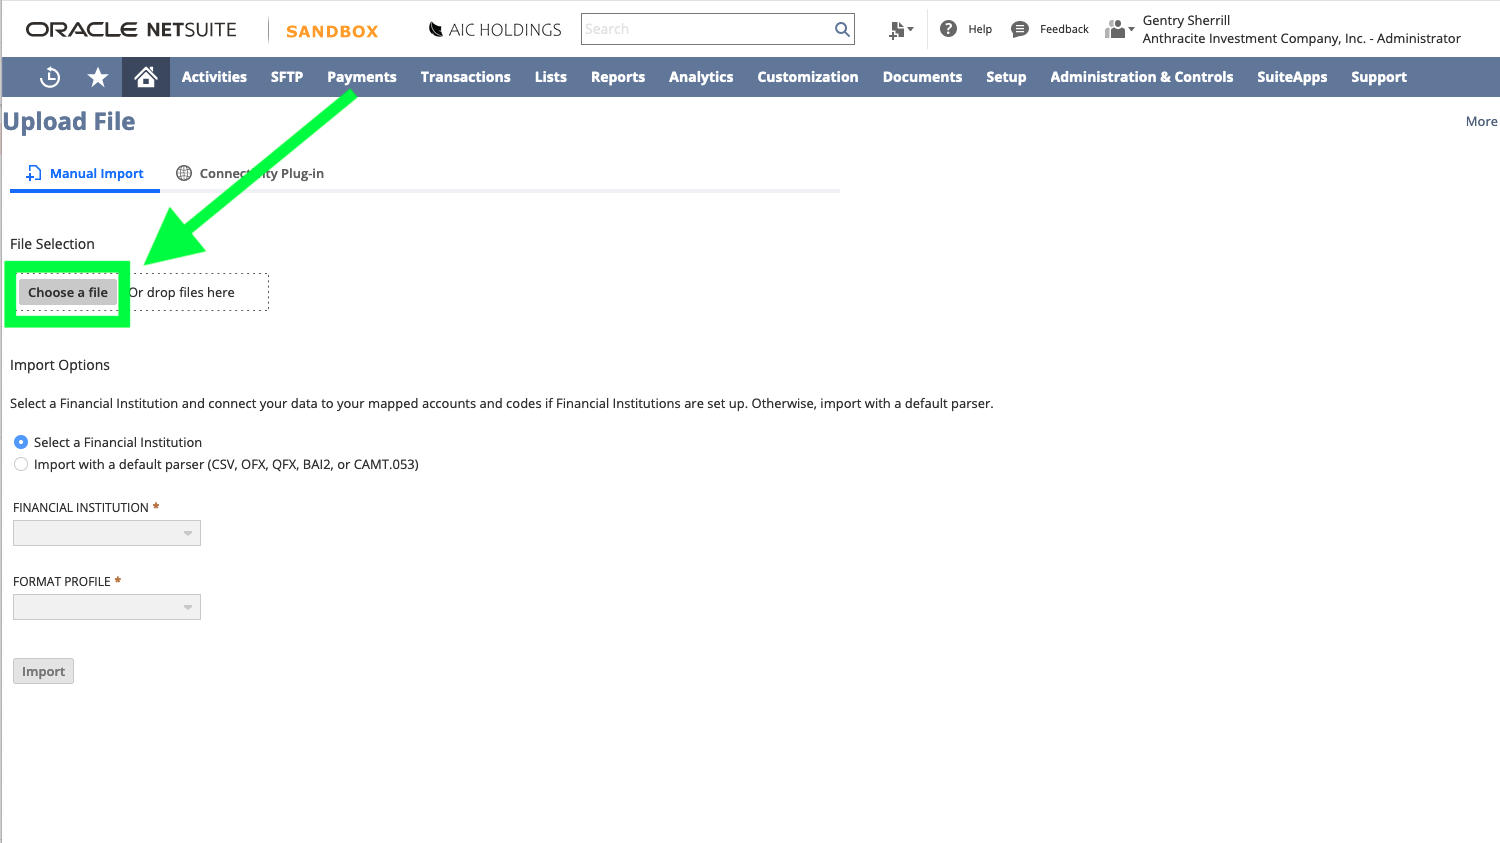
2. On the Upload File screen, click the 'Choose a file' button and select the file you generated from Ledgible
3. After choosing the file, make sure you click the radio button to the left of "Import with a default parser" so that it is selected. By default this is set to "Select a Financial Institution" instead.
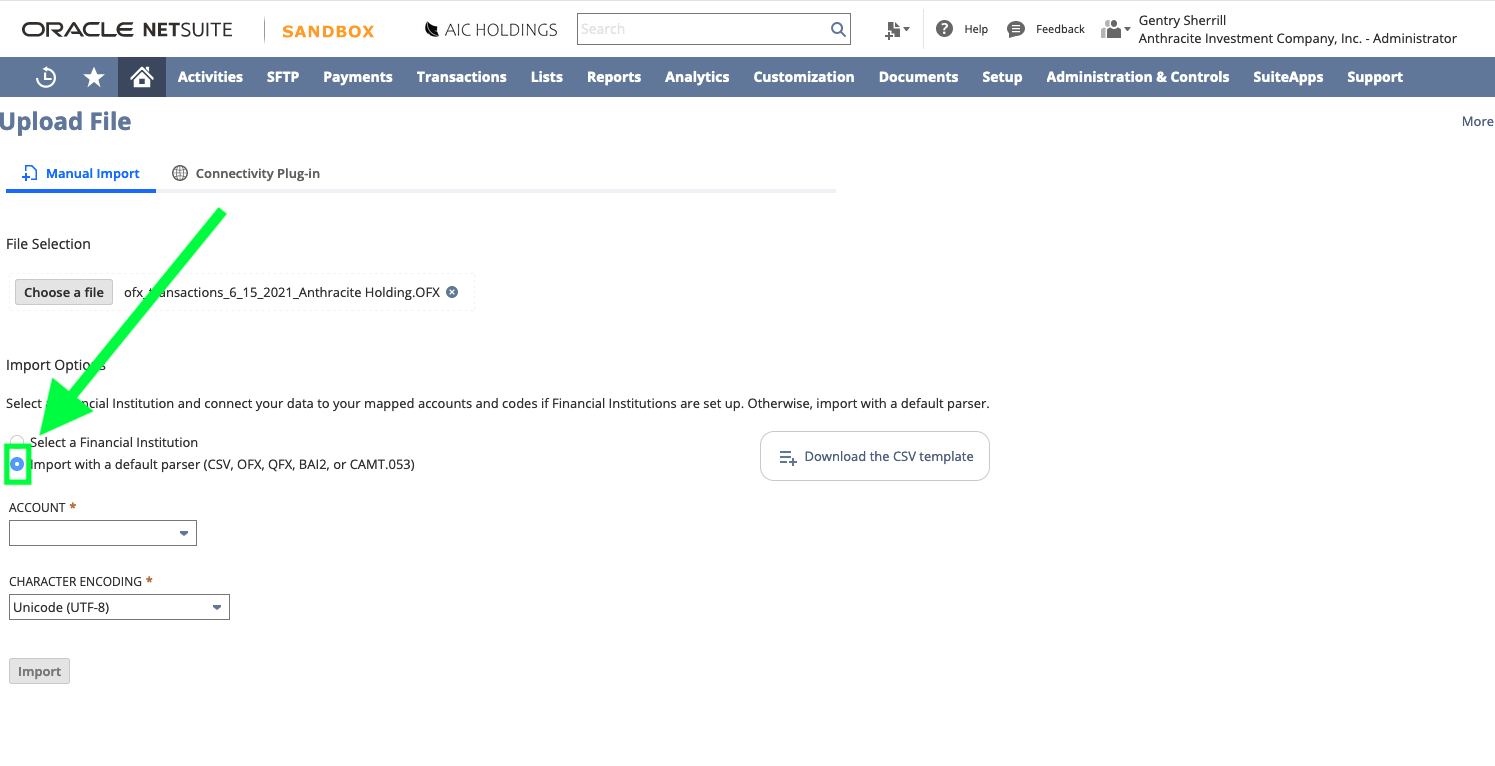
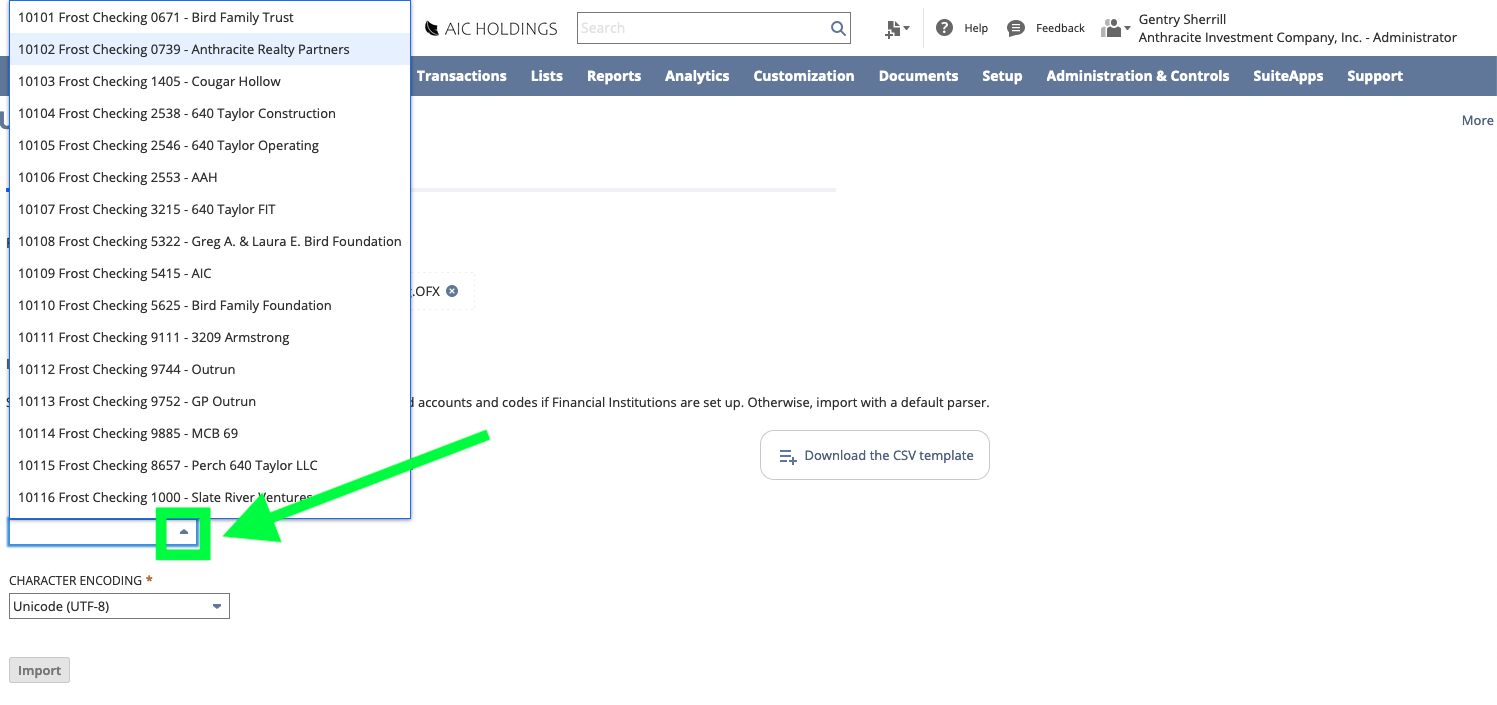
4. Next, click the "Account" dropdown and choose the account or entity that you would like to import the transactions from Ledgible to
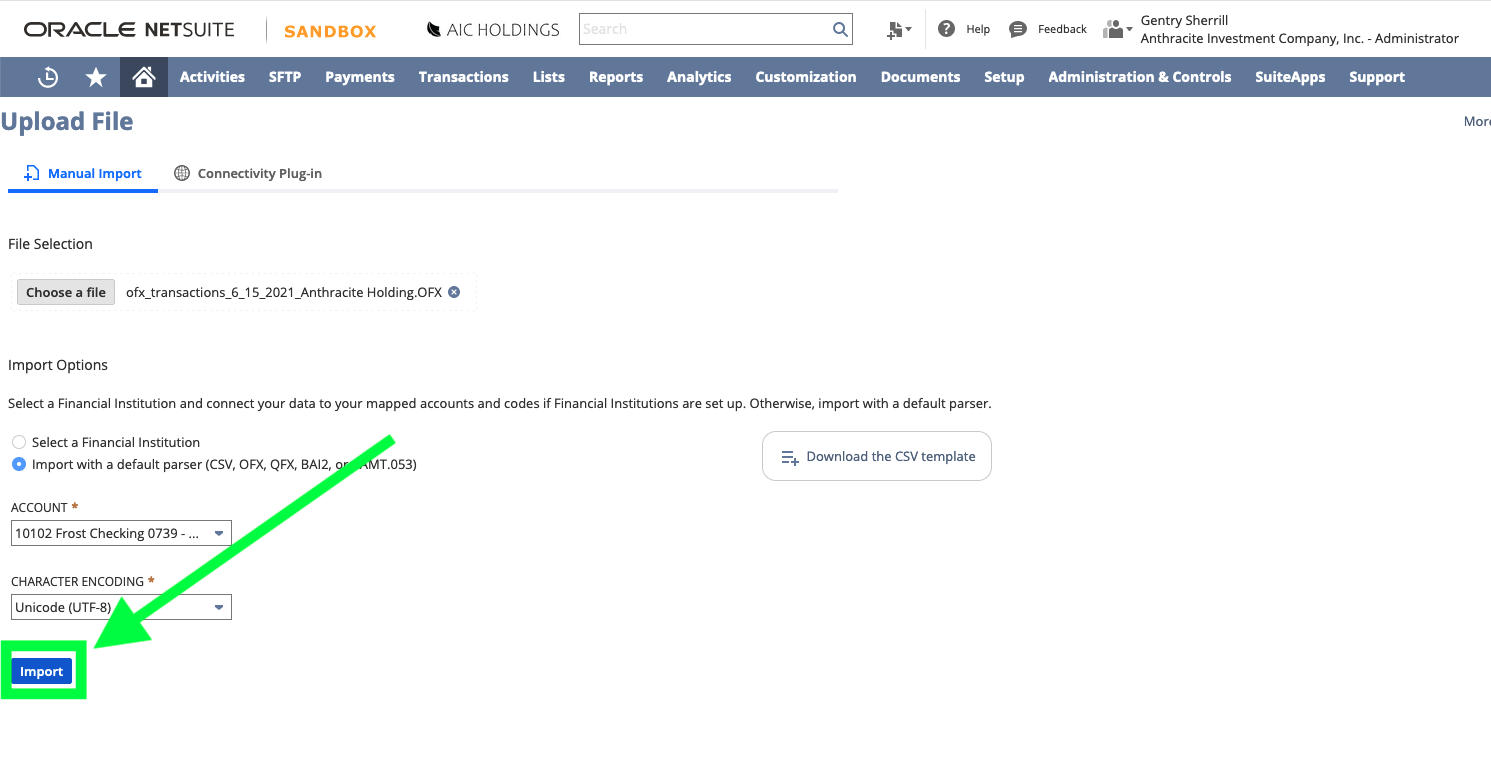
5. Finally, click the 'Import' button at the bottom of the page to start the import
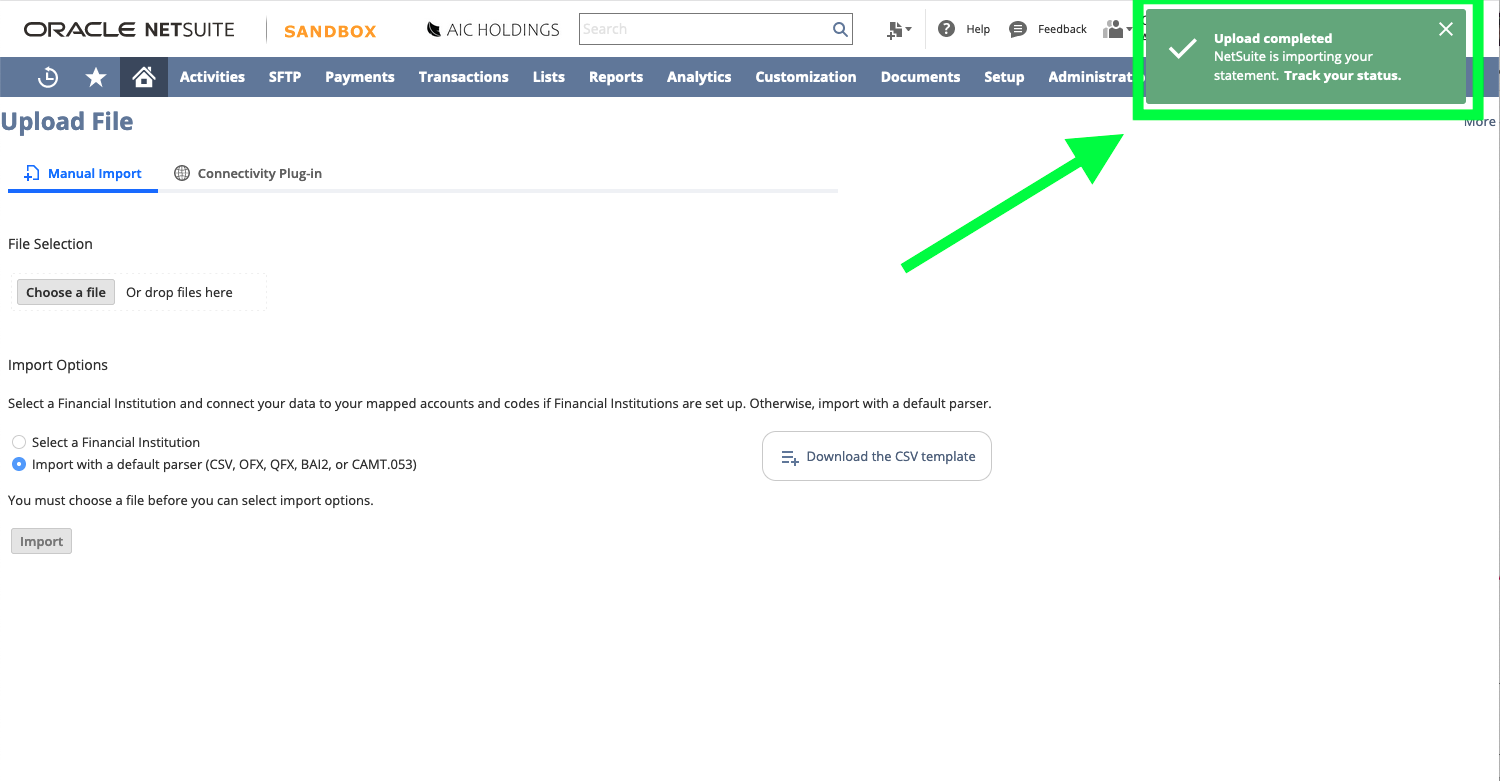
After clicking 'Import', you should see a small, green alert in the upper right corner of the screen noting that the import has begun:
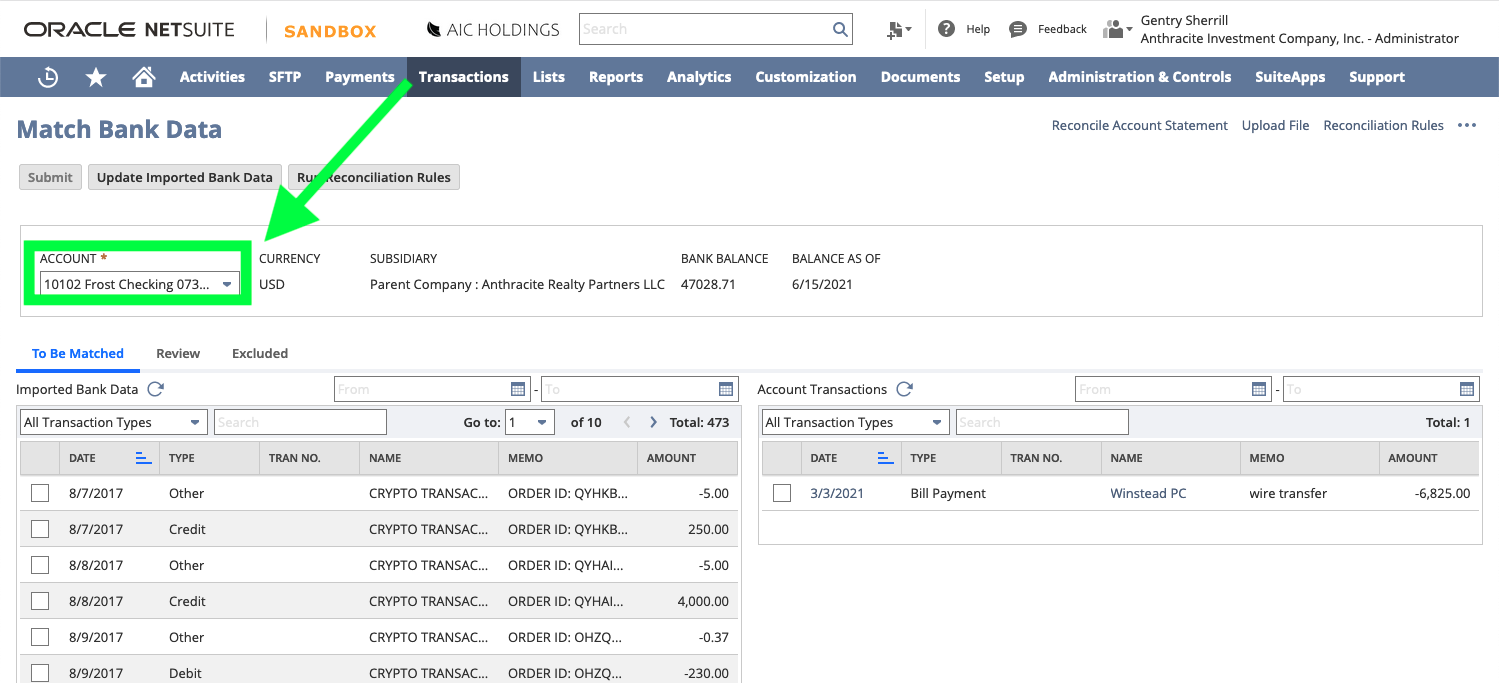
6. Once the import has completed, you can find your new transactions via Transactions > Bank > Match Bank Data
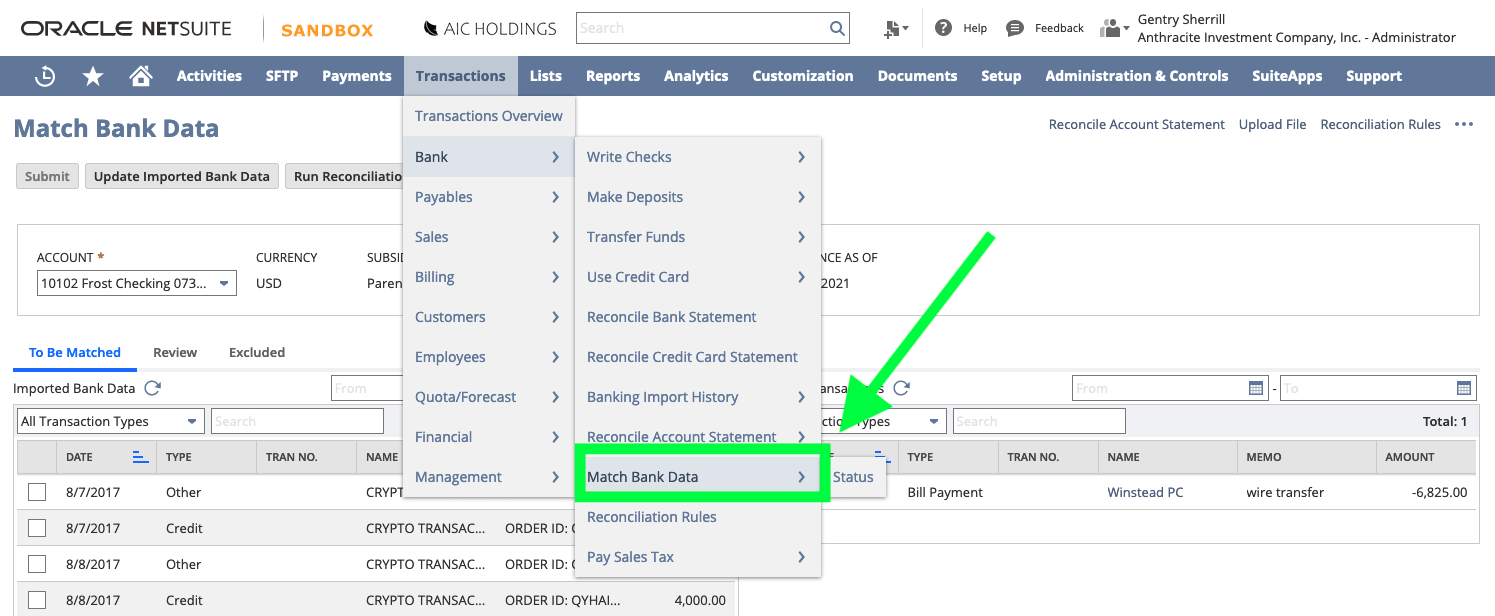
On the 'Match Bank Data' page, note that you'll need to select the NetSuite account you chose to import the records to in Step 4 for the new transactions to show up on the page
